Some tickets bought on smartphone do not need to be retrieved for physical tickets in a terminal. This really is determined by either the bus company and/or the ticket seller. You’ll need to check the app you purchased your tickets on to see if you need to simply scan your phone or go through the more cumbersome process of retrieving a physical ticket. Here are some machines that sell tickets and are also ticket pickup locations for tickets purchased on an app or website. While there is some English, the signs have not been fully translated. The orange writing states these machines can accept only credit card and debit cards. If you only have cash, you may need to purchase tickets solely at the ticket windows.
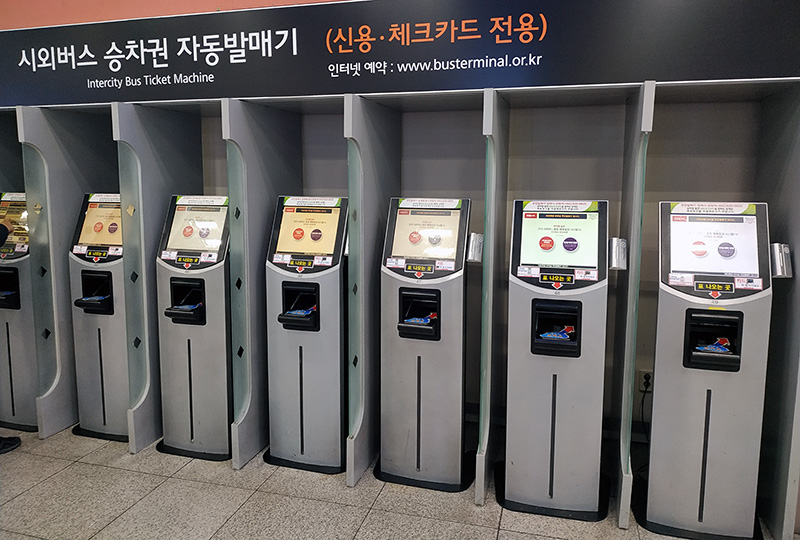
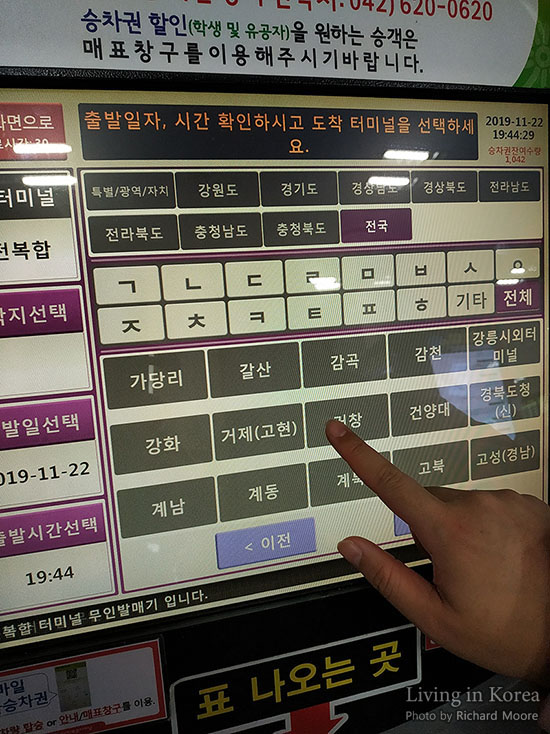
There might be different versions of ticket machines for intercity and express buses and they also might differ by terminal. We have incomplete information so we cannot say anything definitive on the topic. These images were taken in Bokhab Terminal (복합터미널) in Daejeon and are of the intercity bus ticket machines.
Walking up the machine we see a touch screen, a card scanner to the right, and the tickets are dispensed below the screen. You'll notice that there is no button for changing languages, which means this machine is monlingual. If you want to see the image and words more clearly, click the picture to see a larger version.
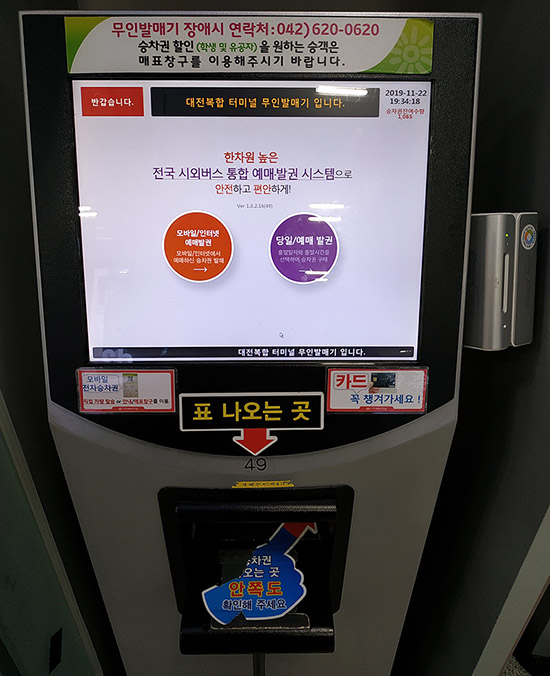
The orange button on the left is for tickets purchased on a smartphone app (모바일, mobail, from the word “mobile”) or tickets sold on a website (인터넷, inteonet, from the word “internet”. The purple button to the right is for purchases for today (당일, 當日, dangil) but other days can be selected.
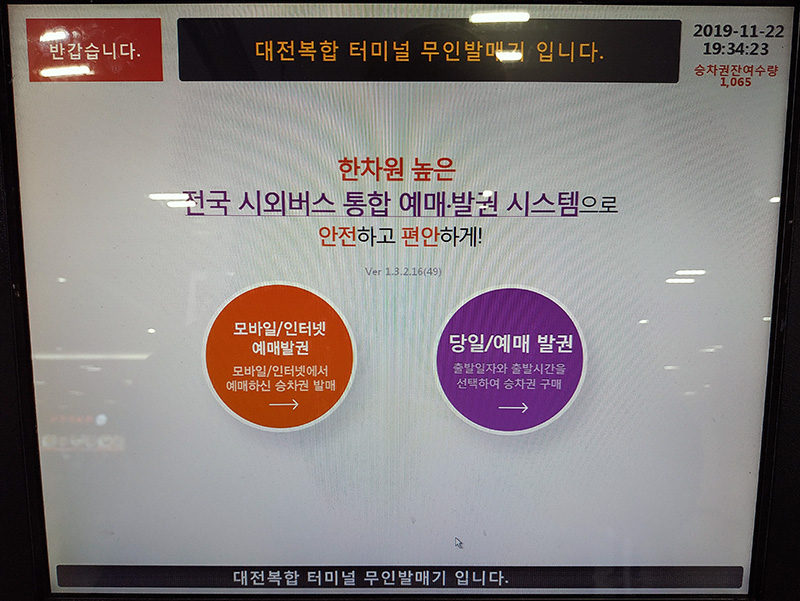
If you are purchasing the tickets here, you’ll click the purple button and then select the destination terminal, the time, your seat, and then pay with a debit or credit card.
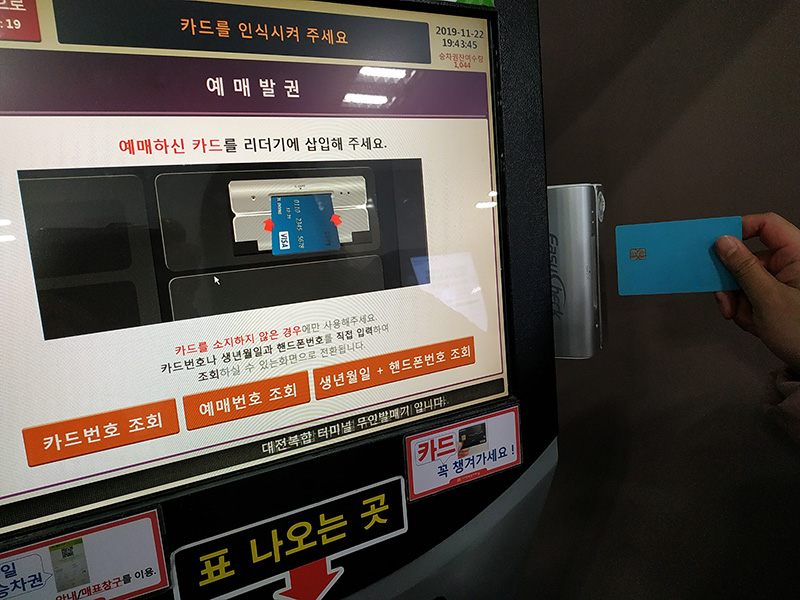
If you bought your ticket on a smartphone app or online, you’ll click the orange button at the first menu. The next screen you’ll see is to confirm you are the real purchaser of the ticket. If you have the card you purchased the tickets with, insert it to the right of the screen in the card scanner. Make sure the chip is facing you so the card can be read.
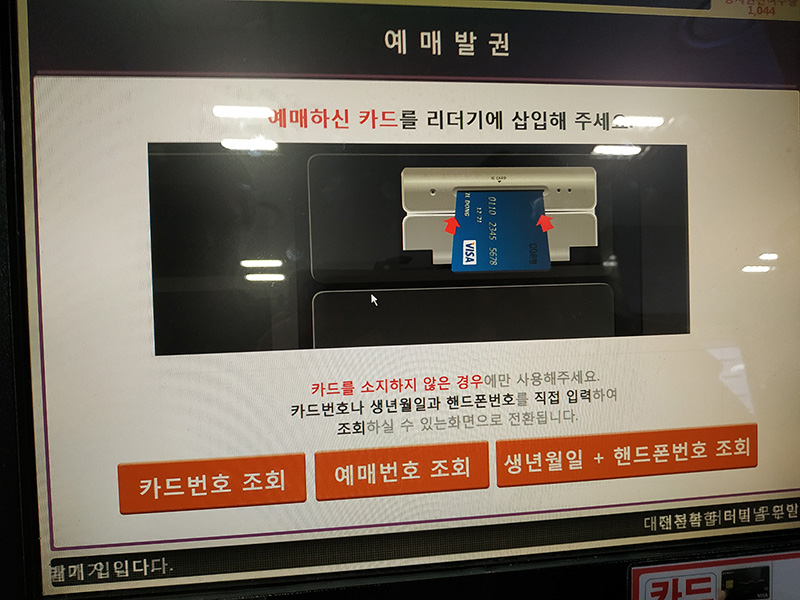
If you don’t have the card with you, you’ll need to select one of the buttons on the bottom. The buttons on the left says 카드번호 조회 (card番號 照會, kadeubeonho johoe) which is for if you have the purchasing card number but don’t have the card physically with you. The button in the middle says 예매번호 조회 (豫買番號 照會, yemaebeonho johoe) which is if you have the purchase number for the ticket. The button to the right says 생년월일 + 핸드폰번호 조회 (生年月日 + handphone番號 照會, saengnyeonworil + haendeuponbeonho johoe) which is asking for the birth year, birth month, birth day and the telephone number used when purchasing the ticket. If you select this option be prepared to enter the first six-digits of your Residence Card number which is your birthday in YYMMDD format. So if you were born on October 30, 1983 the first six digits would be 831030. As birth information is common knowledge in Korea, the first six numbers aren’t seen as secret and don’t need to be protected unless you don’t wish to reveal your age. The numbers after the dash in your Residence Card are secret and should be protected.
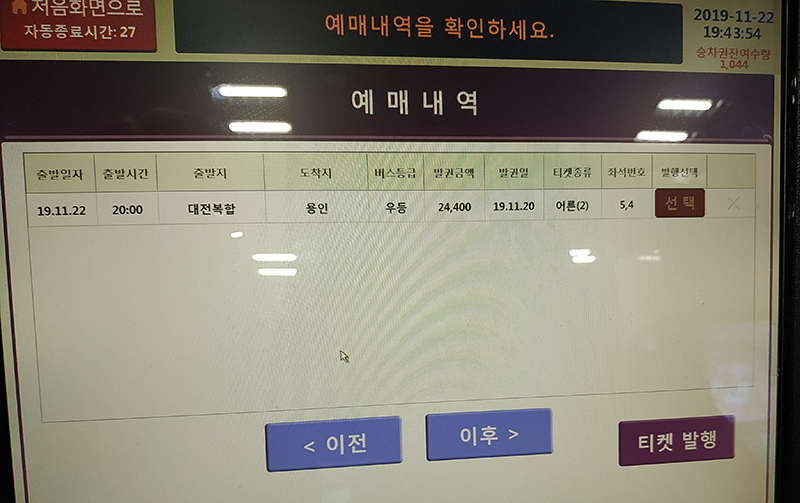
Now that you have identified yourself as the purchaser, you’ll need to select which tickets you wish to print. If you’ve ordered a number of tickets, just select the tickets you need now so you don’t lose any tickets by mistake. A common technique in Korea is people purchase more tickets than they need as they are unsure when they’ll arrive at the bus terminal and therefore are unsure which bus they’ll ride on. The unused tickets will be returned for a refund minus a penalty based on how much time is remaining before departure of the bus. This technique is also very common for rail tickets. If all tickets for a bus or train are sold out, keep refreshing the ticket app/site as refunded tickets will appear randomly and are quickly sold to other customers who are also refreshing their ticketing app.
Click the button marked 선택 (選擇, seontaek) next to the tickets in question and then click the button on the button right marked 티켓 발행 (ticket 發行, tiken balhaeng) to print them out.
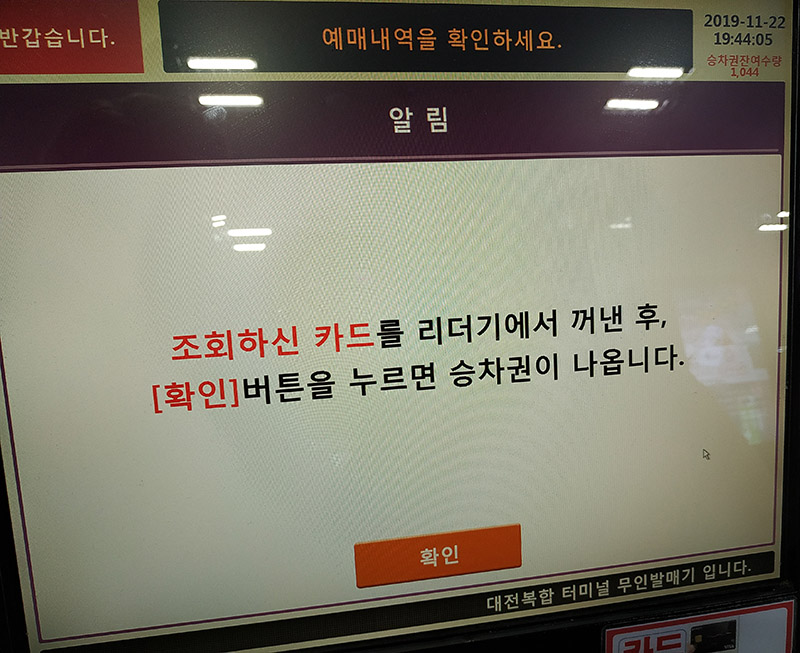
As we had the debit card used when we bought our tickets, we inserted it into the machine a few steps back and have left it until this point. To make sure people don’t forget their card in the machine, this step is telling people to remove their card and press the 확인 (確認, hwagin) button at the bottom in order for the tickets to be printed and dispensed.
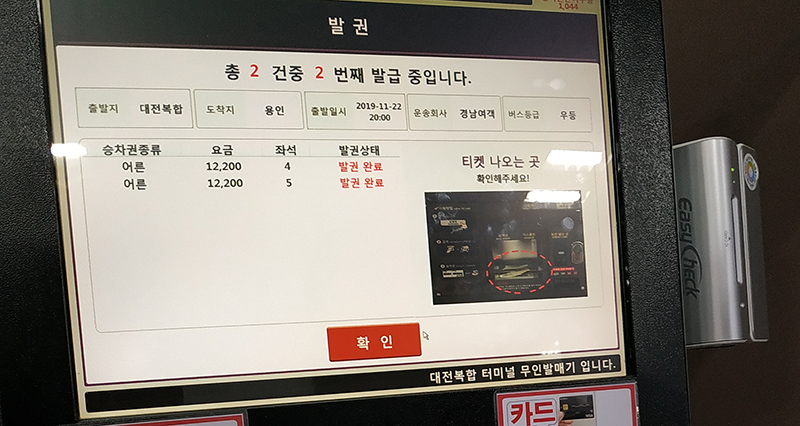
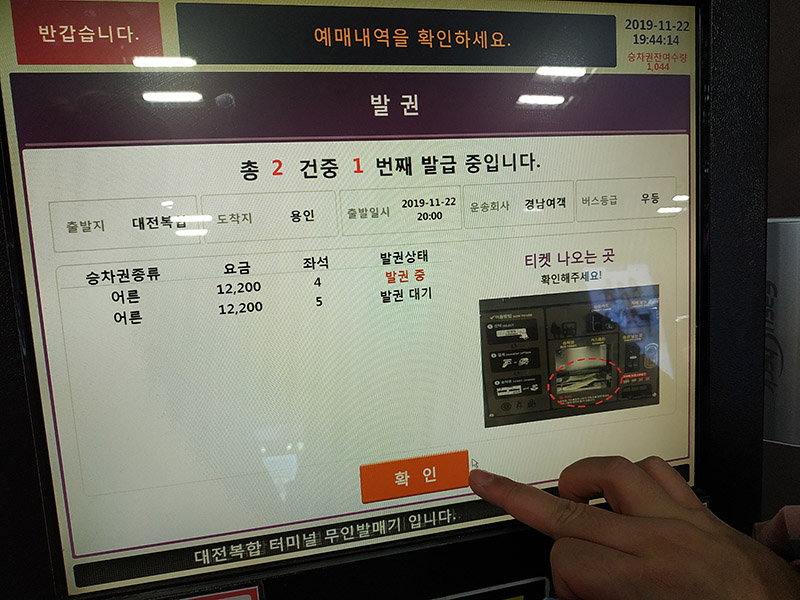
The tickets are now being printed and dispensed. This screen shows the tickets for seat #4 (좌석, 座席, jwaseok) is printing now (발권 중, 發券 中, balgwon jung) and seat #5 will print next (발권 대기, 發券 待機, balgwon daegi).
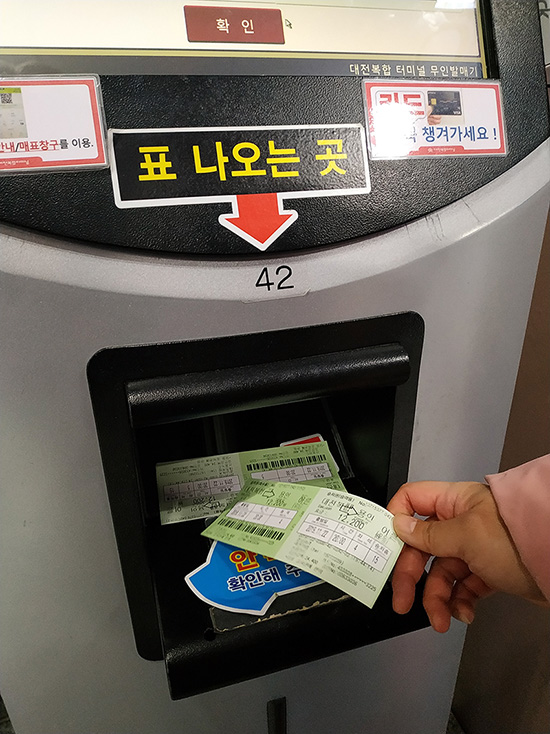
Just under the touch screen is where the tickets will come out. It is marked 표 나오는 곳 (票 나오는 곳, pyo naoneun got) with a big red arrow to make it more obvious.
We can see the words next to each ticket changed to 발권 완료 (發券 完了, balgwon wallyo) indicating they successfully printed. Now that you’ve received all your tickets, press the 확인 (確認, hwagin) button at the bottom to finish the process and return to the first menu. With your tickets in hand, head over to the platforms to find and board your bus.
