The samples images used on this page are from Shinhan Bank and are accurate as of when this page was made. Shinhan was selected as the author has an account with them which makes it easier for him to use their site. The Institute for Basic Science is not endorsing them and we also are not receiving anything from them for using their site as an example here.
Certain details and wording may differ banking site to banking site and even between years as they redo their websites. The purpose of this page you are reading now is to give you an overview of what to expect as you create a digital certificate (공인인증서, 公認認證書, gongininjeungseo) with the bank you have an account at. If you have accounts at several banks, which is very common in Korea, you’ll just need to make a digital certificate at one bank. Don’t make it at both as the second will invalidate the first. For simplicity, make the digital certificate at the bank you will use the most, or at least the banking website or smartphone app you expect to use the most. If you already have a digital certificate and want to use it at another banking website, you’ll need to register the certificate you have with the other bank. That process is very similar to issuing a digital certificate and we cover that on another page.
You’ll need multiple items to complete this process. Make sure you have them all before you start otherwise you’ll just be wasting your time. Residence Card (ARC), bankbook/passbook or at least your bank account number, your PIN, a security card, a smartphone or basic mobile phone which can receive calls and/or text messages, and you may need to talk to the bank ahead of time to tell them to enable online banking for your account. Also optional is for you to have a USB stick as you can save the certificate to there and physically bring the digital certificate with you wherever you go. This is a nice option if you sometimes use your work machine and sometimes use a computer at home and want the flexibility to do banking from either.
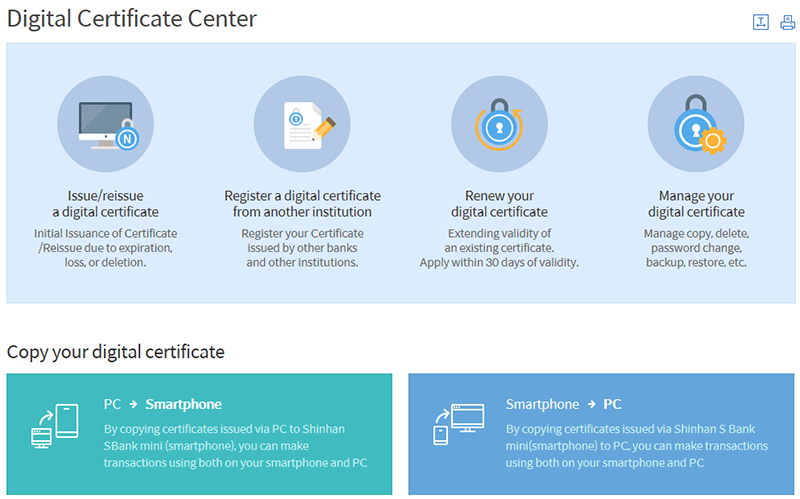
Go to your bank’s website and look for wording similar to Digital Certificate Center. Thankfully, it seems a lot of banks use similar or even the same terminology.

We see several options on this site. For the page you are reading now, we are covering issuing or reissuing a digital certificate, so you’ll want to click the related button.
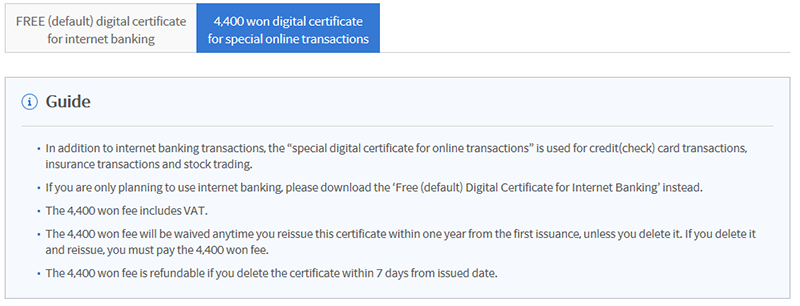
It is normal to have two options; a free version and a paid version. Get the free. You may find features you want with the paid version, but for most people the free version is sufficient.

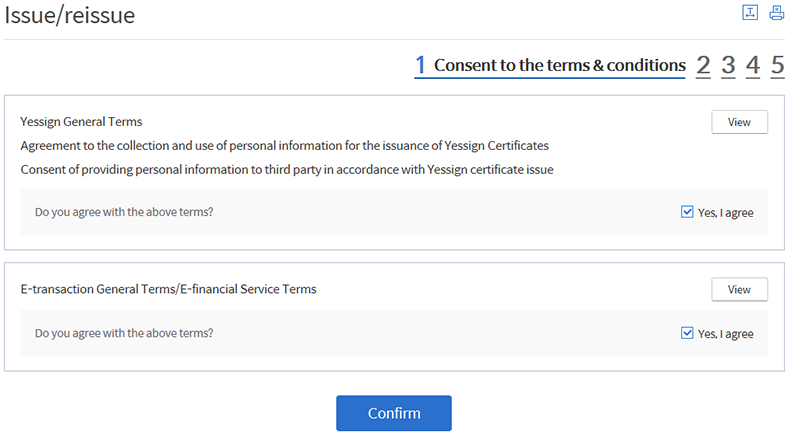
This bank’s website gives an overview of the process, which is very nice, especially if you’ve never done this before. You’ll see the step numbers on the top right of the pages throughout this process.

Just like when you install software, you’ll need to agree to some terms and conditions. While some may be optional, expect all of the terms and conditions to be mandatory that must be agreed to before continuing.
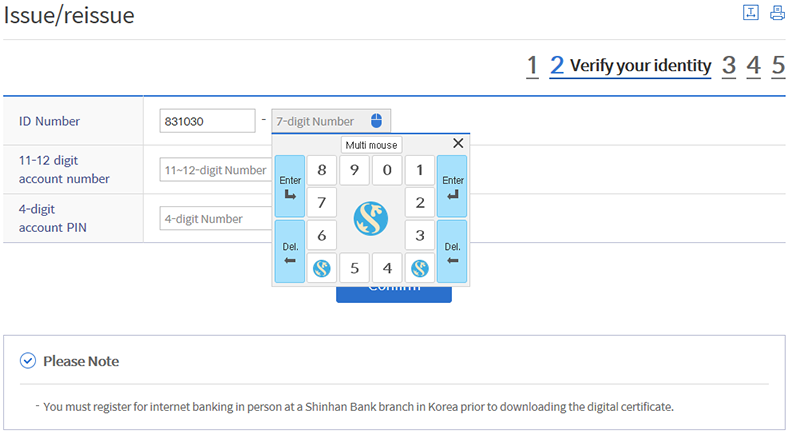
Now you’ll need to input some numbers. In this case, they want the numbers on your Residence Card (ARC) which is six digits birthday and then seven digits. The next line is for your bank account number, which can be obtained a few ways, one of which being on the first page of your bankbook/passbook. And the last line is your PIN code.
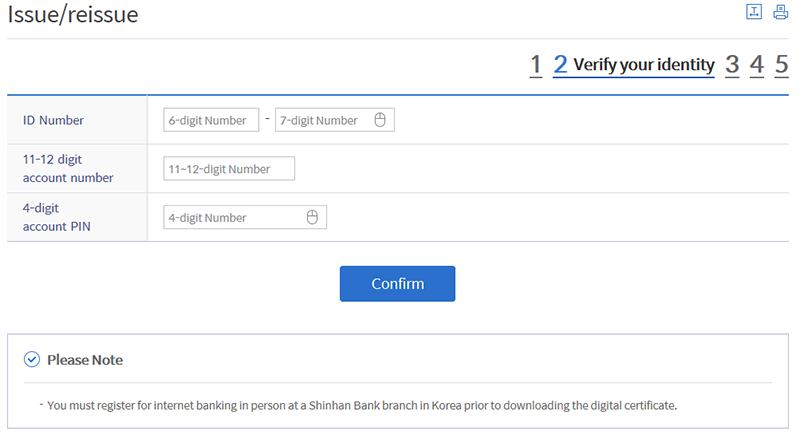
Note that there is a mouse icon on several of the lines. This is an alternative way of typing numbers as clicking on it will have a small popup with keypad. The reason for this is some banking theft or hacking can occur which keystroke recording software in which when you type sensitive information, like an ID/password, ARC number, PIN, etc. and then, if that software is installed on your machine, then someone else might have a copy of it. As an extra layer of protection, you can sometimes input sensitive information with a popup and manually clicking the mouse instead of the keyboard. This is optional on some banking websites and mandatory on other banking websites. The example image below shows this for a numeric keypad, but there is a larger version with a full keyboard that we’ll see later in this digital certificate process.
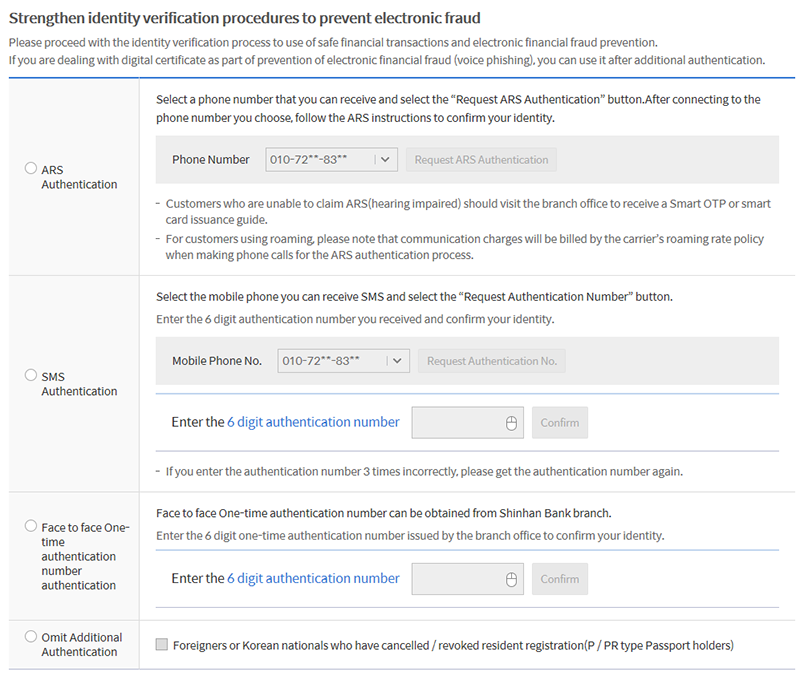
Next, the bank will confirm your identity with your mobile phone. The options here are for ARS, SMS, face-to-face, and not applicable. If you select ARS, you’ll get an automated phone call asking you to input a code presented on the computer screen. After keying in the code, the voice will tell you if it worked and if so, end the call. Please wait until you get that confirmation before hanging up. Chances are the automated call will be in English but this might depend on which bank you have an account with.
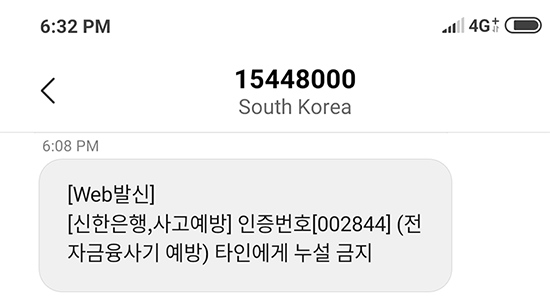
The SMS option is where you get a text message (SMS) with a numeric code and you need to input it to the website. The text message will only be in Korean and will be from a generic phone number. It doesn’t matter if you can’t read Korean as you just need the numeric code. Here is a sample of a single use code sent by a bank.
Keep in mind that different banks have different options. In addition to phone-based verification and single use number offline at a branch, KEB Hana, and potentially other banks, also has the option to complete the process while overseas. They call it Overseas Resident, and this is providing authorization for the bank to electronically contact Korean Immigration and check to see if you left the country or not. Once verified, this step is completed.

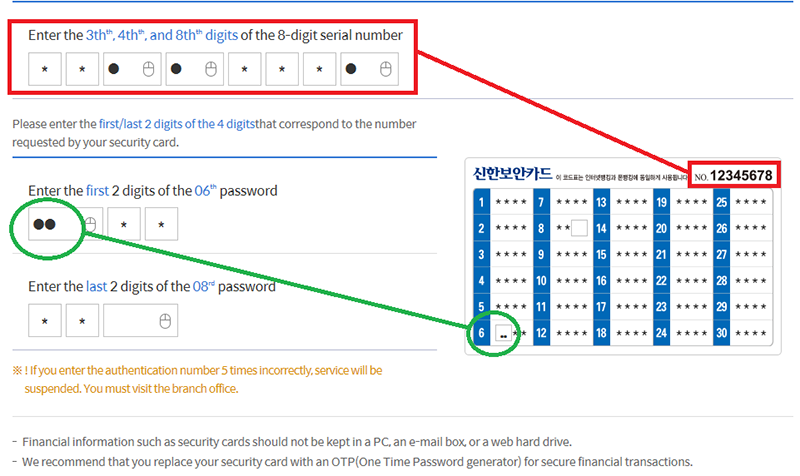
Now you will need your security card. The front of the card is generic, and the rear side of the card has numbers your need. Flip over the card and we’ll first need some digits from the top right side of the card. The wording on some websites is confusing, so we put a red rectangle to highlight this part. Note that by typing in numbers, these boxes are displaying a black circle to show it is filled. Also note the mouse icon, so you can input these numbers with your mouse, if desired.
Now we’ll need two sets of numbers from specific lines. On this occasion, the banking website is asking for the first two numbers from the 6th line, as shown in the green circle, and the last two numbers from the 8th line.
This is the only time you’ll need these digits on the top right corner but you will need numbers from specific lines when paying for online purchases or doing an online wire transfer. Some people take a picture of the reverse side of their security card so they don’t need to bring this physical thin plastic card with them so it is within their smartphone accessible whenever needed. If your phone has a password, this can be a nice option as the numbers on your security card are protected by your mobile password, but this also creates a vulnerability as anyone with access to your phone could access the numbers of your security card.
Unfortunately, this is not theoretical as there have been instances in which someone’s account has been hacked and money stolen electronically. During at least one investigation, it was discovered that the victim had a picture of their security card stored within their smartphone. The court has ruled that based on this lapse in security done by the victim, the bank was not responsible for the breach and related theft and therefore was not responsible to repay the stolen funds to the victim. With this in mind, we highly recommend you do not store an image of your security card in your phone or anywhere else.
With this popup, we are almost done with the process. Now you can select the location where you will save the digital certificate. If you will do all your banking at one computer, then saving it to that computer is a good option. If you want to have access via multiple computers, you might want to save it to a USB stick so the certificate can be mobile.
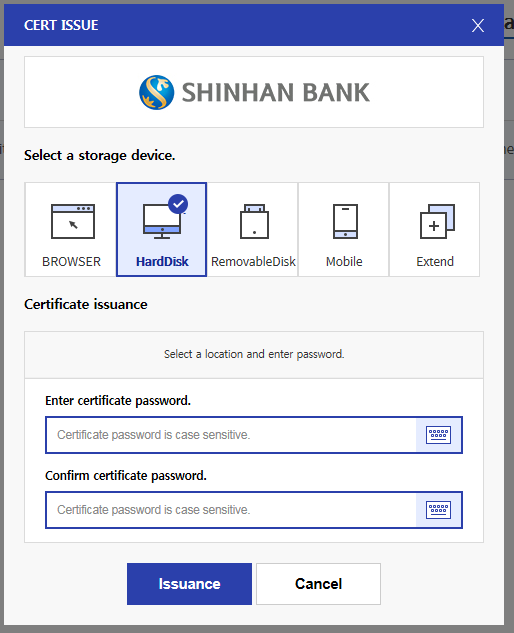
Most people save to their computer, USB, and/or smartphone but there are sometimes additional options. If you click the button marked Extend, you’ll get a few more options on locations to save the certificate.
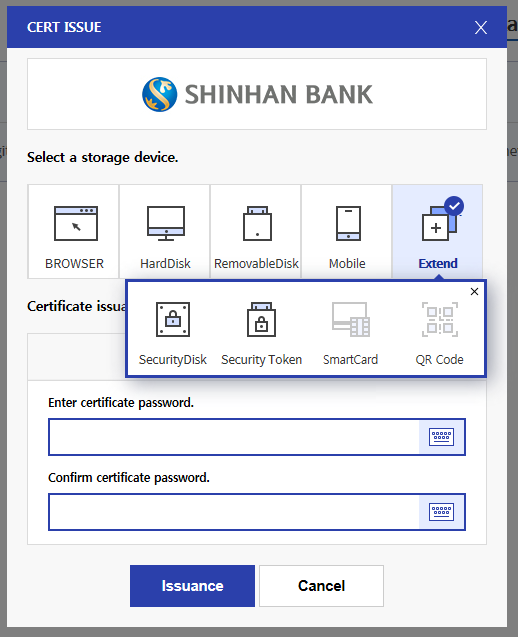
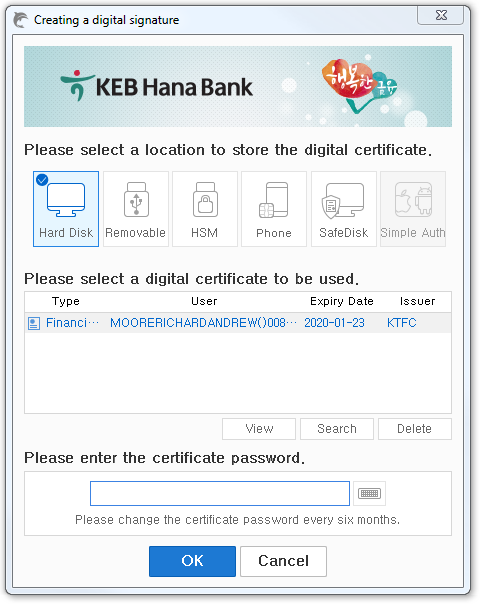
While digital certificates are very standardized, the locations where you can save them can differ bank to bank. The example above is from Shinhan Bank, and the example below is from KEB Hana.
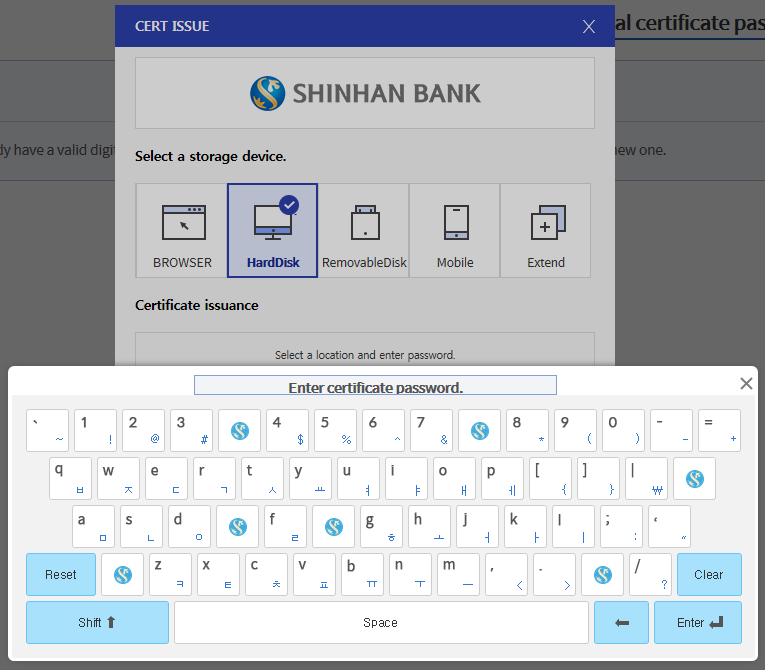
Select the location where you want to save your certificate, and type your password and then confirm your password by typing it again. Note that the password boxes have an image of a keyboard on them. This is just like the mouse image that we encountered earlier; clicking it will have a virtual keyboard popup which should help protect you from keyboard recording software. If you click the keyboard image, this is what you’ll see.
In this instance, I selected the digital certificate to be saved on my computer as I do most of my banking on this machine. I entered my password and it saved it on my computer. With this company, the bank is offering to save it at a second location. Depending on which company you do your banking with, you might or might not have this option.
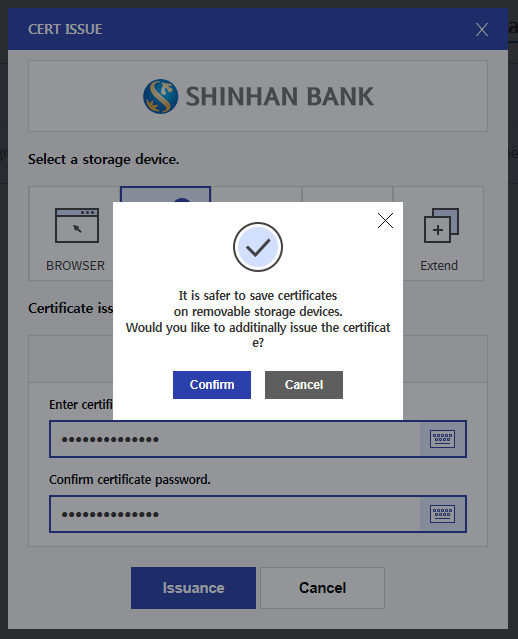
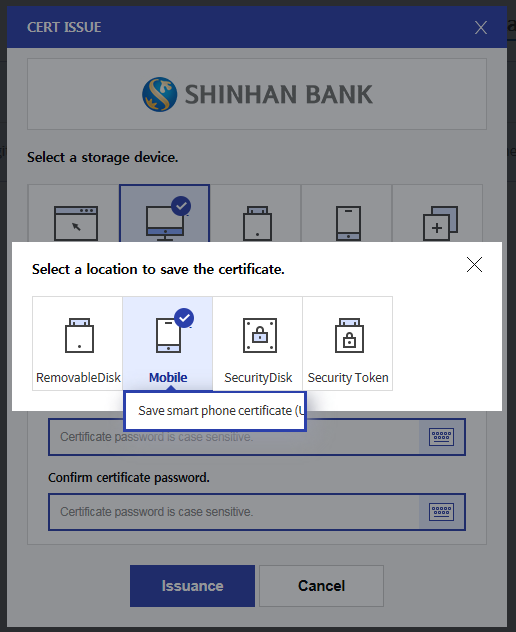
I desired to save a second copy, so I clicked the Confirm button and got this new popup for more mobile locations to save the file at. Again, options will differ bank to bank. The USB is easiest, especially as on this occasion the smartphone option required additional software to be installed on my computer and was only available in Korean.
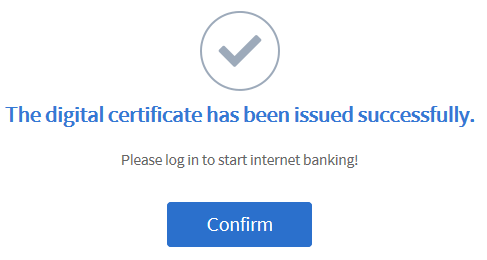
When the process is done, you’ll get a confirmation screen that you completed everything.
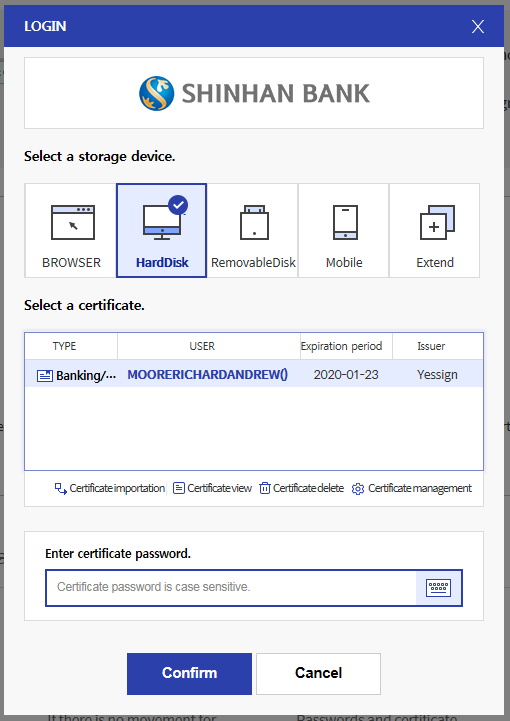
Now you can login and access your bank account online via your computer via a digital certificate. Some banks allow login via ID and password, some don’t. If you login via digital certificate, you’ll see the now familiar popup, but this time you need to select the location where your certificate is stored. For myself, I saved the certificate on my computer’s hard drive, so I select HardDisk and it shows one certificate it found. My name is displayed in order of my ARC with Family name and then Given name + Middle name and no spaces so Richard Andrew Moore is written MOORERICHARDANDREW. I can also see the expiration date for the certificate and that it was issued by Yessign.
Select the certificate you wish to use, type your password via your keyboard or click the virtual keyboard, and you should be able to access your account.
Keep in mind that you can only use your digital certificate at the bank that issued it, unless you register it at another bank. For that process, click here to read more, and thankfully it is a similar process to the initial issuing that you did to get the certificate in the first place.